Indoor cycling at home has an image problem. The typical mental picture involves a bulky bike shoved into a spare bedroom corner, a ratty towel draped over the handlebars, a tablet propped on a stack of books, and a fan pointed vaguely at the rider from across the room. It works, technically. But the space fights against consistent training because it signals neglect rather than intent.
Riders who train consistently at home almost always have a space that feels deliberate. Not expensive, not magazine-ready, but intentional. The bike has a place. The screen is at the right height. The fan works. The floor is protected. Everything needed for a session is within reach without searching.
Setting this up properly takes less than an afternoon and makes a measurable difference in how often you ride.
Location Matters More Than Size
The first decision is where the bike lives. This matters more than most riders think because location determines ventilation access, visual environment, noise considerations, and how intrusive the setup feels in your daily living space.
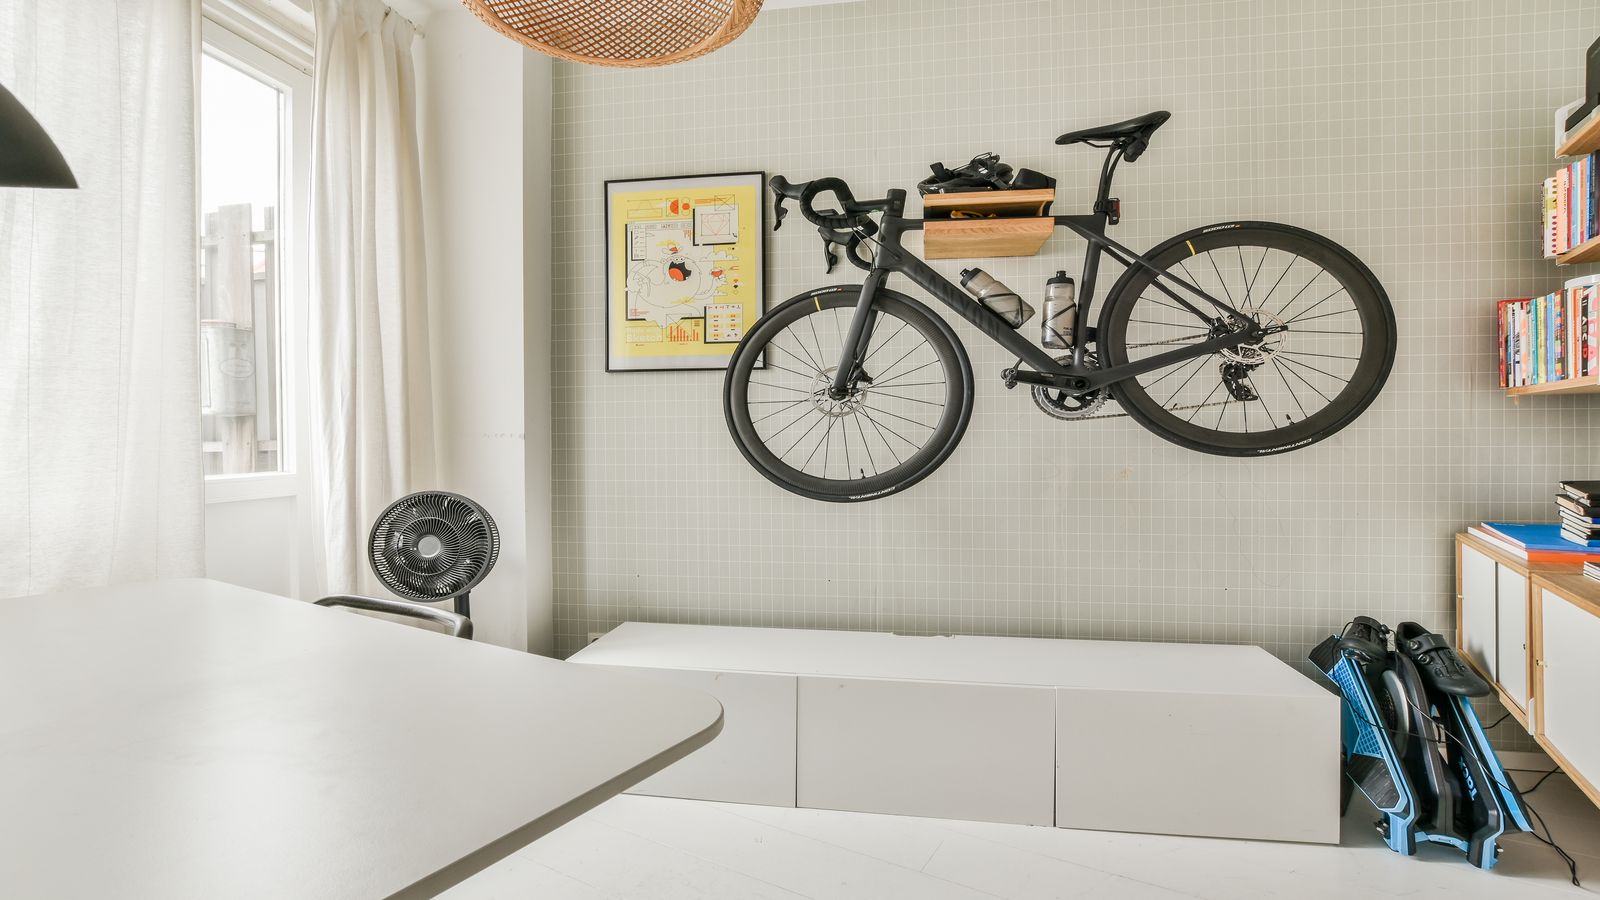
Spare bedrooms work well if ventilation is adequate. Most spare bedrooms have a window that can be cracked during sessions and a door that can be closed to contain noise and sweat. The disadvantage is that bikes in spare bedrooms are out of sight, which can reduce the visual cue to ride. Some riders address this by keeping the door open when the room is not in use.
Living room corners keep the bike visible and accessible but require the setup to look presentable. A bike mat, a clean equipment arrangement, and a screen solution that does not involve a laptop balanced on a chair make the difference between a setup that looks intentional and one that looks like temporary storage.
Garages offer ventilation and space but introduce temperature and dust challenges. Winter sessions in an unheated garage are miserable. Summer sessions may be excessively hot depending on climate. Dust settling on the bike and sensors between sessions requires more frequent cleaning.
Dedicated spaces are ideal but not necessary. If you happen to have a room or area that can be permanently configured for cycling, the ergonomic and motivational benefits are significant. But most riders do not have this luxury, and a well-configured corner of an existing room works nearly as well.
The Floor
Protect it. Indoor cycling produces two things that damage flooring: vibration and sweat. A bike mat handles both.
Purpose-built equipment mats (typically 4mm to 6mm thick rubber or PVC) sit under the bike and extend slightly forward and to the sides. They dampen vibration, catch dripping sweat, and prevent the bike from shifting during high-effort intervals. A mat also defines the ride space visually, which helps the setup feel like a distinct zone rather than random equipment placement.
Do not use a yoga mat. They are too thin to dampen vibration and too narrow to catch sweat that drips beyond the bike footprint. Equipment mats designed for stationary bikes are not expensive and are worth the investment.
The Screen
Where you position the display for the platform interface affects neck comfort, immersion, and session sustainability during longer rides.
The ideal position is directly in front of the rider at approximate eye level when seated in a neutral riding position. Looking down at a tablet on the floor or up at a screen mounted high on a wall introduces neck strain that compounds over sessions.
Practical solutions include a small side table at the right height, a floor-standing tablet holder with adjustable height, or a wall-mounted arm at handlebar level. The specific solution matters less than the outcome: eyes forward, neck neutral, screen visible without head tilting.
Screen size affects immersion during Cyclum sessions in particular. Environment visuals are more engaging on larger screens, but a tablet at the right height is better than a large TV at the wrong angle.
Ventilation Is Non-Negotiable
Indoor cycling generates substantial metabolic heat. Without airflow, core temperature rises faster than it would on an outdoor ride where wind provides natural cooling. Overheating shortens sessions, increases perceived effort disproportionately, and makes the entire experience unpleasant.
A single strong floor fan directed at the rider’s torso and face is the minimum effective setup. Position it about 1.5 to 2 metres in front of the bike at roughly chest height. The airflow should hit the rider’s core and face, not just their legs.
In warmer climates or poorly ventilated rooms, a second fan adds meaningful comfort. One fan from the front and one from the side creates cross-ventilation that more closely approximates outdoor riding conditions.
An open window supplements fan airflow and prevents the room from becoming a humidity chamber during longer sessions. Even in winter, cracking a window during a ride improves air quality noticeably.
Hydration and Towel Access
Position a water bottle and towel within arm’s reach. This sounds obvious, but many riders put their water bottle on a table two steps from the bike, which means they either skip hydration during intervals or lose rhythm reaching for it.
Most indoor bikes have bottle cage mounts. Use them. If yours does not, place a small table or stool within handlebar reach. The same surface can hold a towel, a phone, or anything else you need during a session.
Hydrate before the session starts. Riders who arrive at the bike already slightly dehydrated will feel it within 20 minutes. Drinking during the session maintains performance rather than recovers it.
Keeping It Clean
Sweat corrodes metal, degrades rubber grips, stains surfaces, and creates odour. A 60-second wipe-down after every session prevents all of these problems.
Keep a cleaning spray and dedicated cloth near the bike. Wipe down the handlebars, frame, seat post, and any exposed metal after each ride. Wipe the bike mat if sweat has dripped onto it. Drape the towel to dry rather than leaving it bunched on the bike.
This single habit extends the bike’s life, keeps the space presentable, and removes the “stale gym” smell that makes shared living spaces uncomfortable.
The Visual Environment
A home ride space does not need to look like a commercial spin studio. But it should not look abandoned. A few intentional choices make the space feel like a place you want to be rather than a place you tolerate.
Keep the area clear of non-cycling clutter. A bike surrounded by laundry baskets and storage boxes sends a subconscious message that the space is not valued. Remove unrelated items and let the cycling setup stand on its own.
Consider the wall the rider faces. A blank wall works. A window with a view is better. A poster, a print, or a simple visual reference that you enjoy looking at during recovery intervals adds a small but real quality improvement to longer sessions.
Good lighting helps too. Ride sessions in dim, poorly lit rooms feel more effortful than sessions in well-lit spaces. Natural light is ideal. A bright lamp is a reasonable substitute.
The goal is not interior design perfection. It is creating a space where starting a session feels like a positive choice rather than a resignation to discomfort.
For hardware setup and sensor guidance specific to the platform, see the LIT Bike page. For session type selection that matches your training setup, explore the game modes section.